Showing posts with label baking. Show all posts

Tuesday, October 28, 2014

Raspberry Coconut Cupcakes


Cupcake Wars should not be watched unless accompanied by delicious cupcakes. So that is what a friend and I did Friday night.

Once we had settled on a few main ingredients (coconut and raspberries), I picked the recipe with the pretties picture. The French blog Les Friands d´Lise won that competition, and it helped that I already had all the ingredients it called for. Luckily, I had google to help me translate the French recipe, and I think it turned out great. We only did a few minor tweaks along the way, adding raspberries and coconut to the cupcake batter. This may be my best attempt at cupcake baking - ever, so the recipe has my recommendations!

RASPBERRY COCONUT CUPCAKES

Makes about 18 small cupcakes with non-heaping frosting.

Cupcakes:
240 g flour
200 g sugar
2 tsps baking powder
80 g cold butter, cut in small pieces
160 g coconut milk
120 g milk of your choice
2 eggs
100 g frozen raspberries in small pieces
3 tbsp shredded coconut


In a mixer, mix flour, sugar, and baking powder with the cold butter till it resembles bread crumbs.
Add coconut milk, milk, and an egg at the time till the batter is combined well.
Carefully fold in the raspberries and the coconut at the end.
Fill cupcake liners 4/5 full.
Bake on 180 C for 15-17 minutes.
Mine came out with a perfect dome shape, but it might have been mirage, cause a few seconds later the tops were flat as pancakes. Also, the picture below shows my kitchen mid-cooking.


Raspberry compote:
300 g raspberries (fresh or frozen)
Juice from 1 lemon
A little sugar to taste

Cook everything on low heat till most of the liquid has evaporated. Make sure you don't sweeten the raspberries too much. The tartness of the compote is a wonderful addition to the cupcakes

Frosting:
125 g softened butter
175 g powdered sugar
75 g cream cheese
A pinch of salt

Beat the butter to a creamy consistency. Add sifted sugar, some at the time, and mix well. Mix in the cream cheese in the end. If you have any raspberry compote left after filling the cupcakes, it can be added to the frosting. Double the frosting if you want mounds of it, we went for the lighter route.

Assembly:
Once the cupcakes have cooked and cooled down, cut a small hole in the top of each cake and fill with a teaspoon of raspberry compote. Frost the cupcakes to your liking/according to your abilities. I need a frosting class, since I am obviously clueless. Garnish with shredded coconut. I have tried hard to find coconut flakes here in Skien, but no luck yet. Can anyone help me figure out where to get it?

Monday, September 8, 2014

Polar bread/Polarbrød

This fall has really had that "back to school"- feeling. I have started a new job at a school, and my husband is taking language classes four days a week. We used to eat lunch at work, but now we have to provide our own, so I have been baking on Sundays to fill our lunch boxes for the rest of the week.

Since Mike isn't too excited about bread, I have made a few batches of Crackerbread/Knekkebrød, but when I found a recipe for Polarbrød I knew I had to try it. He first tried Polarbrød some months back, and it was love at first bite. These are a healthier version of the one you can buy in the stores, not quite as soft and cake-like, but very tasty, and a lot cheaper as well. The recipe was found on Trines Matblogg.


POLARBRØD

Ingredients:
150 g oats, finely ground or oat flour
500 g whole grain flour (spelt, wheat or other)
300 g fine wheat flour
15 g fresh yeast or 6 grams dry yeast
1 tsp sugar
1 tsp salt
4,5 dl milk
2 dl water
1 dl oil, for example sunflower oil

- First, make your own oat flour by grinding small amounts of oats with a hand mixer or food processor. You can buy oat flour as well, but this a quick and easy way to make your own.
- Combine all the dry ingredients in a large bowl.
- Add the liquid with a temperature of about 25 C.
- If you have a standing mixer, mix everything on slow speed and let the machine knead thoroughly on medium speed for 10 minutes. You can also knead the dough by hand and get a little exercise...
- Let the dough rise to double size, for about 1 hour.


- Cut the dough in 24 pieces. I used a scale the make sure they were even, about 70 grams each.
- Use a rolling pin to make round breads about 1/2 cm thick and 10-11 cm across.

- Poke holes with for example a chop stick to avoid the breads from puffing up during cooking.
- Let the bread rise for another 10 minutes.
- Bake for about 9 minutes on 225 C

These little guys thaw quickly (in about half an hour) so it is best to store them in the freezer and get them out when you need them. If you need them for lunch they will definitely be ready if you get them out in the morning. You can also thaw/reheat them in a bread toaster or in the oven.

Wednesday, August 6, 2014

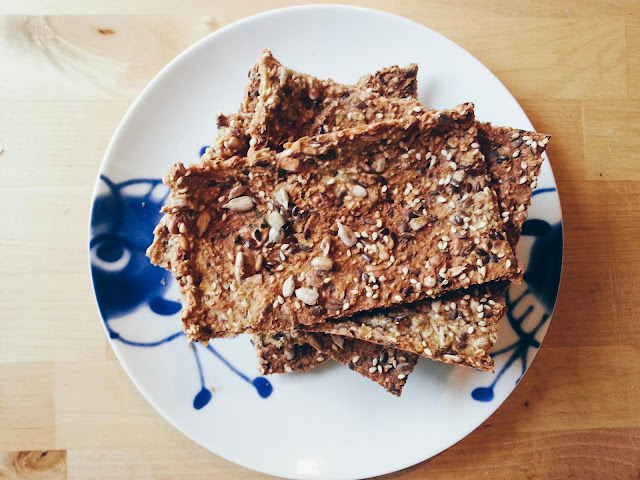
Seed and Herb Crackerbread/Knekkebrød


Slow-baking crackers doesn´t sound like the perfect summer activity, but I was craving said crackers, and decided to brave the heat. I discovered some store bought crackers with a Mediterranean flare a while ago, and wanted to see if I could recreate the flavor at home.

My recipe is based on one found in the book "Godt å gi bort" by Nina Dreyer Hensley and Jim Hensley, but I adapted it to what was in my cupboard, and added herbs to half the batch.

SEED AND HERB CRACKERBREAD

Ingredients:
4 dl whole grain spelt flour
4 dl oats
2 dl sunflower seeds
1 dl flax seeds
1 dl sesame seeds
1,25 dl oat bran
1 tsp salt
3 tsp herbs (I used a mix of dried and fresh oregano, parsley and chives, basically what I had at hand. This was not enough for a substantial herb flavor, probably partly because the crackers have so much flavor in them selves. Double or triple the amount of herbs to your taste.)
7 dl water
extra seeds for decoration

1. Heat up your oven to 180 C and grease or line two baking sheets


2. Mix all the dry ingredients


3. Add water and let the mixture sit for a few minutes.

4. Spread the dough evenly on the two baking sheets.
A spatula is helpful in this process, but be armed with patience,
as it can be tricky to get an even layer without holes.

5. Sprinkle some extra seeds on top if desired

6. Cook the crackers for 15 minutes, take them out of the oven 
and use a pizza slicer or knife to cut into pieces.

7. Let the baking sheets switch places and cook for another 40 minutes. Check if they are crispy, if not, cook for another 5-20 minutes, but keep a close watch so they don't burn.

Alternatively you can cook the crackers on the hot air setting at 160C, and let them cook for about 1 hour total. I tried both, since I only own one baking sheet (it's true, and I wish it was easy to find the right size so I could get at least one more), and I think I liked the second option best. 

Store the crackers in air tight tins,
 and enjoy with cheese or any other favorite topping!


Saturday, May 31, 2014

Spelt rhubarb muffins


Last week we were over for dinner at a friends house, and as I looked around the garden I suddenly exclaimed "Rhubarb!". The host acknowledged my enthusiasm, and kindly offered me some to take home. Rhubarb is such a lovely summer fruit (?) and I have fond memories of rhubarb desserts from when I was a kid.

This time I really wanted to make muffins, and wanted to try a recipe with spelt flour for the first time. This recipe is a mix of two other ones I found online, and it worked out alright. I would maybe add some more sugar to offset the tartness of the rhubarb, depending on your taste.

RHUBARB MUFFINS

500 grams spelt flour
1 dl sugar
2,5 ts baking powder
2 ts cardamon
2 eggs
6 ss olive oil
2 dl sour cream (you can also use yogurt)
2 dl water
3 - 4 dl rhubarb

Rinse and cut the rhubarb in small pieces.
Mix all the dry ingredients.
Mix the wet ingredients separately.
Fold the rhubarb into the batter.

Fill muffin forms 3/4 full and cook at 200 C for 20-25 minutes

PS. You can by the rhubarb print here. 

Monday, November 11, 2013

Chocolate caramel cookies

Here is another recipe from my birthday party a while back. These are really rich and decadent, and consequently very good.

Double Chocolate Caramel Cookies

110 grams butter
300 grams brown sugar
55 grams cocoa powder
2 eggs
1 tsp baking powder
a little salt
200 grams flour
100 grams dark chocolate
20 tsp caramel/dulce de leche
sea salt

First thing first: make the caramel. This time I decided to make dulce de leche. I have wanted to make that for years, but never had a good excuse/the initiative to do so. It is not hard, so you should not be intimidated. Simply cover a can of condensed milk with boiling water and let it simmer for a couple of hours. Check back to make sure the water level is high enough, I had to refill a few times. When you open the can, delicious caramel will burst forth, it is such a fun surprise. I guess you can buy caramels in the store, which helps if you have limited time.

Cookie dough: Melt the butter. Add sugar and stir till dissolved. Add cocoa powder and egg, mix well. Mix baking powder, flour and salt and add the dry ingredients to the dough till it is smooth. Chop the chocolate in smallish pieces and fold into the dough.


Use about half the batter and make 20 cookies with a hole in the middle (using your fingers to make the hole works best). Add a spoonful of caramel in the hole (see picture), and cover with more cookie batter, shaped like little hats. Sprinkle sea salt on top.

Cook for 15 minutes at 180 C.

I forgot to sprinkle sea salt on top, and I bet it would have made them even greater!

I found the recipe on this Danish site that will definitely inspire you to bake more, the pictures are gorgeous and might make you drool, so you are warned.


Friday, November 8, 2013

Plum meringue pie


For my birthday party a couple of weeks ago, I decided to make a pie from one of my Jamie Oliver cooking books. There are a few of his recipes that I come back to again and again, but I had only made this Nectarine Meringue Pie once before, and it was many years ago.

The day of the party I went to get the last ingredients, and discovered that there were no nectarines at the store. I had my mind set on this pie, and quickly decided to switch it up and use plums instead. Plums were more seasonally appropriate anyways, I should know that.

Making a pie shell is not one of my favorite things to do, but I think it turned out well this time. Here is a recipe and how to for the pie shell. You can add lemon zest to the crust if you like for a sweet pie like this one.

On to the goodness:

Plum meringue pie

1 portion pie dough
1,2 kg ripe plums or peaches/nectarines
115 grams sugar
some butter

1 TBS corn flour
5 large egg whites
125 grams sugar or vanilla sugar

Crust: Roll out the cold dough and cover the pie form. Put it in the fridge/freezer while you make the filling.

Fruit filling: Cut the fruit in half, then half them again (and again), mix with sugar, corn flour, and butter and cover with foil.

Cook the pie shell and the fruit separately on 180 C for 15 minutes.

Meringue: Whip egg whites till they are completely stiff (I guess this takes about 10 minutes or so). You should be able to hold the bowl upside down without the egg falling out! Add the sugar and whisk some more.

When the pie crust and fruit is done, pour the fruit into the pie shell and add the meringue on top. Put it all back in the oven and cook for 8 minutes or so, till the meringue is golden. Enjoy it warm or cold.

I wish I had a picture of it, but trust me, it looked pretty cool!

Sunday, October 27, 2013

Fall treat: Apple chips


Last night I had some girls over for a belated birthday celebration, and the day was spent in the kitchen, baking up a storm. As I was eating a wonderful late breakfast with my roommate, I noticed there were a lot of apples sitting in a bowl. We were discussing the menu for the night, which surprised me, as I would usually have thought everything through and gone shopping days in advance. That was not the fact this time, which gave room for some improvisation.

We already had banana bread, and my heart was set on a specific pie, so apple muffins didn´t get a vote. I was thinking it would be nice with a snack, and remembered trying apple chips just a week earlier. Recipes for it were all over the internet, it seemed easy enough, and suddenly we were making this sweet treat! My guests liked it too, and since it is super healthy, how can you not make this?

APPLE CHIPS

Ingredients
3 Apples
1 TBS Cinnamon
1 TBS Sugar
1/4 tsp Nutmeg
A pinch Salt

Heat your oven to 80-90 C.
You need to slice the apples super thin. This is difficult if you dont own a mandolin, but with a steady hand and sharp knife you will do alright.
Spread the apple slices on baking trays (this will fill two trays).
Mix the spices.
Sprinkle spice mix on apples and rub it in a little.
Cook the apples for half an hour, flip the slices and cook for another hour or so till they are crispy. Well, they might not get very crispy at all, depending on how thickly you sliced them, but they will still taste very good!

PS. I found the recipe here.

PPS. Recipe for pie and cookies will come later.

Thursday, October 17, 2013

Rosemary raisin bread


One of my favorite recipes for bread is one by Jamie Oliver. This unusual bread is perfect with cheese, or even just butter when it´s fresh and hot from the oven.

Rosemary raisin bread

1 kg white flour
30 grams yeast
30 grams salt
30 grams honey/sugar
6 1/4 dl water

a large handful raisins, chopped
a bunch rosemary, chopped

Mix flour and salt.
Dissolve yeast and honey in lukewarm water.
Add water to the flour till mixed. This is where you add raisins and rosemary. You could potentially add anything you want right here: nuts, herbs, spices, seeds...
Then you knead the dough till it is firm and soft. Let it rise and double in size in a warm place.
This makes two large bread. Shape them the way you want, I like to let them live their own life, but you can use bread pans if you want, but then you might have three loafs instead.
Let the bread rise to double size again.
Make deep cuts in the bread with a sharp knife and bake on 180 C for about 25 minutes.

I think this bread is best the day you make it, but if you toast it lightly it will taste just as fine later.


Sunday, October 13, 2013

Pumpkin bread recipe


To me, fall equals pumpkin baking, and here is an easy recipe you can use for bread/cake or muffins. I would recommend doubling the recipe, since this freezes well.

Pumpkin bread
Makes 1 loaf

3 cups flour
2,5 tsp baking soda
2 tsp salt
2 tsp cinnamon
2 tsp nutmeg
2 cups pumpkin puree
2 cups brown sugar
1 cup buttermilk
2 eggs
1/4 cup soft butter

Sift and mix all dry ingredients.
Add the rest of the ingredients.

Bake on 175 C for about 1 hour for bread.

I found this recipe on Allrecipes.

PS. This is perfect with salted buttercream frosting.

Monday, September 23, 2013

Sugar and spice and all things nice


I was baking the other night, and it felt really good! Early fall has been beautiful, and I am inspired to bake and make more. So far I have only repeated some of my previous recipes:

- Birthday cake (Chocolate and salted caramel)
- Salted caramel popcorn
- Pumpkin spice syrup. I wish I could communicate taste through words, cause this is simply delicious!

But tonight I will try a new pumpkin recipe - Baked pumpkin Bread. I will let you know how it goes.

PS. Tonight is the last chance to enter my giveaway! I will draw a winner tomorrow.

Wednesday, February 20, 2013

Adventures in truffle making

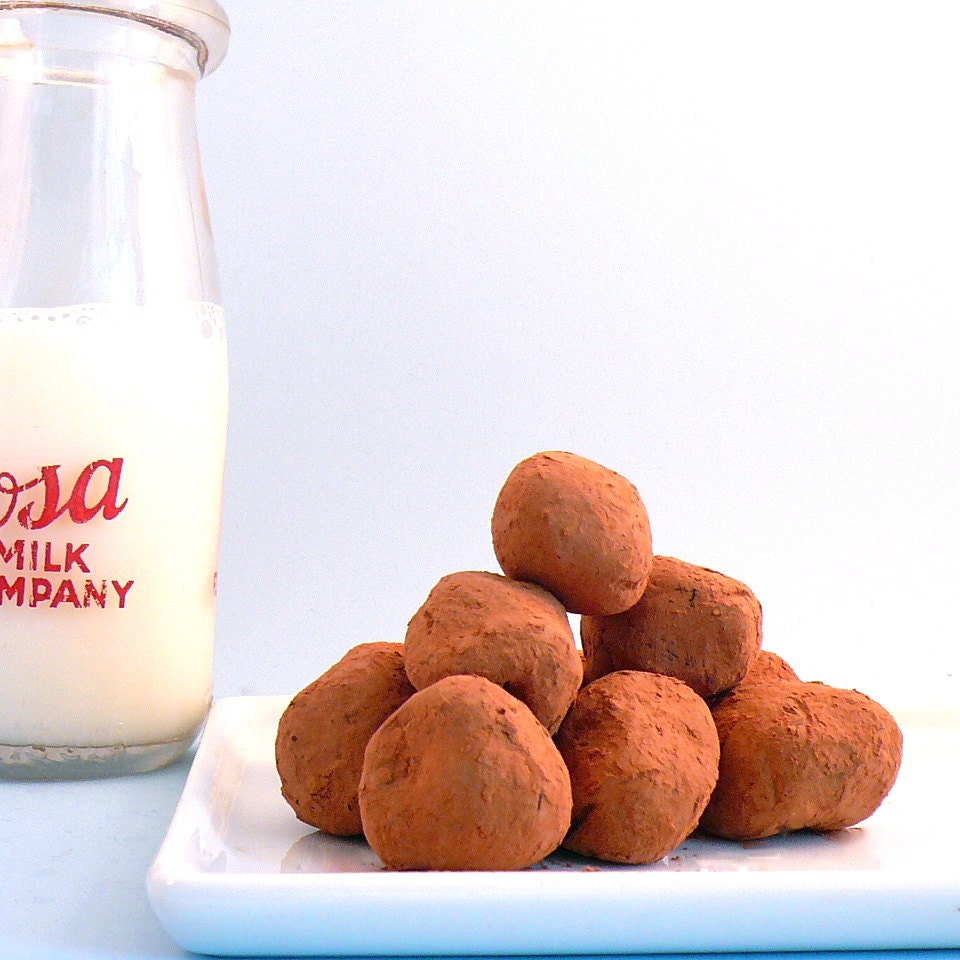
Truffles from Motherfudger Fudge.

I had my sister here this past weekend, and having guests over is the perfect opportunity to try new and sweet recipes. In the latest issue of the Norwegian interior magazine Rom 123, I had seen a recipe for chocolate chili truffles, and it looked too easy not to try.

Sunday night I was ready to make a rich chocolate treat, and with some leftover cream from these salted caramel brownies I made for Valentines Day (And yes, they were delicious, rich, chewy and sweet. You should try them!) I thought I had the all the ingredients I needed. With a list of four things, you would think I did, but I didn´t check the measurements, and had less than half the amount of chocolate it called for.

"Let´s go for it anyway." I was optimistic, thinking it couldn´t matter that much. Well, after the allotted two hours in the fridge, the mix was still a soupy mess, and since night was drawing close, I put the tin in the freezer, to make sure it solidified in one way or another. 18 hours later I remembered my project, and since it was frozen through, it was no problem to cut it into bite size pieces and roll them in cocoa. I was still unsure they would hold up, and sure enough, an hour later, they almost melted when touched, so I decided to freeze most of them.

You can see this as a problem, but I have a couple of solutions:
A. Thaw the amount of truffles you want to eat (they will keep their shape fine) and eat with a spoon.
B. Eat them right out of the freezer. It is the perfect bite size ice cream.

In other words, I would try doing this just like the recipe tells you to. It will taste great both ways though.

Dark chocolate chili truffles
2,5 dl heavy cream
1/4 tsp chili powder
250 g dark chocolate
cocoa powder

- Warm the cream and chili in a small pan. Do not let it boil.
- Add finely chopped chocolate and stir till it is dissolved.
- Pour mixture in a small tin (15x20cm) lined with parchment paper.
- Put it in the fridge for at least 2 hours (probably longer)
- Cut into squares and coat with cocoa powder.
- Store in fridge.


If this seems to cumbersome for you, I found an etsy store that makes similar once for you and you can have them delivered to your door.

PS. Would you call this baking or cooking? I can´t decide what category this fits in.

Thursday, November 15, 2012

Savory apple scones


I had a few apples that were going bad, and decided to try a savory recipe this time:

Savory herbs and apple scones

Ingredients:
250g flour
2 tsp baking powder
a pinch of salt
30g cold butter
1/4 tsp dried rosemary
1/4 tsp dried sage
1/4 tsp dried parsley
250g grated apple
2 dl milk

Sift flour, baking powder and salt in a bowl.
Add butter and crumble it with your hands.
Stir in the herbs and apple.
Work quickly as you add the milk, use a broad knife to mix it.

You can make one big scone, cut in pie pieces, or you can make smaller ones (makes about 12). Brush with milk and cook at 220C for 15-20 minutes.

Voila, very tasty!
Probably pairs well with cheese, and are best served warm.

PS. Free "Cozy up" and many other amazing desktop backgrounds over at Designlovefest.

Tuesday, October 30, 2012

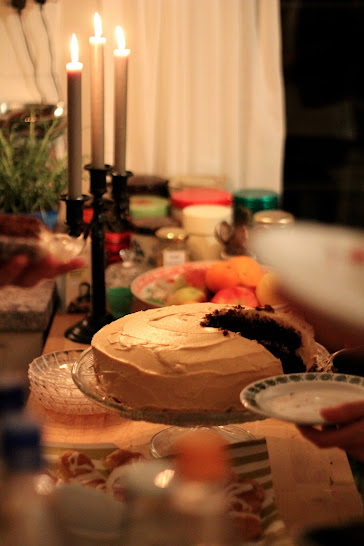
Birthday cake

Birthday cake picture by Erine Solberg
I celebrated my birthday a little while ago and I couldnt resist making this amazing-looking chocolate cake from Kimberly Taylor.

To make sure I had a big enough cake, I doubled the recipe by 1,5 - since the recipe didnt tell me how many servings it would be. Well, rest assured, this was more than plenty for 13 girls. As a matter of fact, we didnt even eat half of it. Good thing I have a boyfriend to help me with leftovers like that... 
Since it made so much, I decided to leave the original measurements here.

Warning: this is a lot of work, but totally worth it! 


So, here we go; 
Salted Caramel frosted Chocolate Cake 
in four steps. 


Step #1: Bake a Chocolate Cake
Ingredients:
(everything should be at room temperature)
160 grams unsalted butter
2/3 cup white sugar
2/3 cup light brown sugar
2 large eggs
1 vanilla bean
1 cup buttermilk
1/2 cup sour cream
2 Tbs brewed coffee
1 3/4 cups flour
1 cup cocoa powder
1 1/2 tsp baking soda
1/2 tsp salt

Turn your oven to 180 C. 
Grease your cake pans. (I used two 28cm round ones)
How to: 
Cream butter and sugars until light and fluffy.
Add eggs, one at the time. 
Add vanilla bean.
Whisk buttermilk, sour cream and coffee in a separate bowl.
In a third bowl, sift flour, cocoa, baking soda and salt. 
Add the wet and dry ingredients to the sugar/butter, a little at the time. 
Make sure it is well mixed, but dont overdo it either!

Bake on 180 C for 20-30 minutes, depending on pan size and your oven.
Step #2: Make Salted Caramel
Making caramel sounds a little scary, but if you follow the recipe closely and dont look away for too long, you will be fine - dont worry. Remember that melted sugar gets very very hot.

Sunday, September 23, 2012

Chocolate banana bread

Win this print or YOUR favorite from Jan Skacelik at Fjeldborgs blog!

Being a part of a YWAM community gives me the benefit of receiving food donations from time to time. With a pile of sad looking bananas sitting in the kitchen, I decided it was time for banana bread. Not just regular banana bread this time, but with the addition of chocolate.

I found this recipe at allrecipes.com. It seemed tested and tried, so I gave it a shot too. Like many others, I cut the sugar in half and the bananas I had were really large, so I thought two would be enough. It turned out great, so great that there is hardly any left now...

Chocolate banana bread
Makes 1 loaf

Ingredients

1/2 cup butter, soft

1/2 cup sugar
2 eggs
2 bananas
1 tsp vanilla
1,5 cups flour
1 tsp baking soda
2 Tbsp cocoa powder
1/2 cup sour cream
1/2 cup chocolate chips

Directions
- Set oven to 175 C.
- Cream butter, sugar and eggs.
- Stir in mashed bananas and vanilla.
- Sift in flour, baking soda and cocoa; mix well.
- Blend in sour cream and chocolate chips.
- Pour batter into prepared pan.
- Bake in preheated oven for at least 60 minutes.Mine took maybe 1 hour and 15 minutes, but that depends on you oven. 

Thursday, June 7, 2012

Blueberry cinnamon buns

Picture from Anthology Magazine

Try this!
Alexi guest blogged at Anthology Magazine with this delicious recipe for cinnamon buns. Blueberries are available, if not in the forest quite yet, Rema 1000 sells some really cheap!

We swapped orange for lime in the glaze, and enjoyed the slight tartness it added to these soft, sticky, gooey and lovely baked goods. Not convinced yet? I have some leftover if you want to try for yourself...

Tuesday, March 20, 2012

The Monkey Bread


I have heard of Monkey Bread for years from American friends, but to us Norwegians it is not a very common treat, and I had never tasted it before. Not until my friend Jae suggested we made it for her birthday. I happily obliged, and thus we started off the analogue week. One major challenge was that we dont have canned dough around here. I thought we could just make a plain sweet bun dough and use that, and as this was planned as a breakfast/brunch treat, we decided to make the dough the night before. I dont know if that was the best decision I have ever made, but leave nothing untried, huh?


But before we started baking, I taught her how to knit. Above you can see the result, impressive for a beginner, right? After making the dough, we continued chatting and knitting (its addicitive!) the night away. I had hoped to wake up to dough that had risen, but I think something went a little wrong. Letting dough rise over night is a genius invention though, that way you can (more) easily bake for lunch/breakfast without the long wait. 

We started dipping and rolling the dough in butter, sugar and cinnamon and proceeded until we had filled the pan to the brim. If this was the reason for unusual long cooking time (including basically taking the whole thing apart and putting it back together - a sticky mess I tell you) or if that was the uncanniedness (Hah! I thought I made up a word, but it actually has a fitting meaning, with slightly different spelling), of the dough, no one will know.


The end result might not look that much like your Mama´s Monkey Bread, and not taste quite the same either, but it was good, and that should certainly count for something.


"What do you do with the leftovers?" I asked innocently, 
after eating as much as I possibly could handle.
"Honestly, Ive never had that problem...", was the answer I got.

Making Monkey Bread for two girls who already had eggs and salad for lunch is obviously not the way to do it, but I continued to enjoy the cake for a couple of days, though it was definitely best right out of the oven. To be repeated? Im not sure. Maybe with a different recipe.


Monday, March 19, 2012

Food for the hungry

Inspired by Astrid, who captures her daily life both in a digital and analogue format, here is a post on some of the food I have made and/or eaten lately.


From the top: Egg brunch, Monkey Bread (more to come on this adventure), mini Klippekrans, waffles at Fugleleiken, butter in my pretty new butter dish from Søstrene Grene, Chicken with mashed potatoes and roasted vegetables, Oat and Wheat bread.

Tuesday, March 6, 2012

The Sister Swiss Roll Party

Swiss roll reminds me of my grandma and afternoon coffee parties. I had never tried making this cake myself, cause honestly, it seemed quite intimidating.

A new twist to the filling was an idea from my sister Andrea. I had cream cheese and blueberry jam in the fridge, so we combined the two for a fresh, yogurt like cream. And with her help and advice, it was just a piece of cake (pun intended).


The recipe:
3 eggs
1,5 dl sugar
1,5 dl white flour
1/2 tsp baking powder

Filling:
100 g cream cheese
a few spoonfuls blueberry jam
sugar

How to:
- Prepare a baking sheet with baking paper and butter it. Preheat the oven to 275 C.
- Whisk eggs and sugar white. This takes much longer than you think, and I am thankful for my patient little sister who knows how to do those things, and for my new kitchen machine (even though it looks a little like a spaceship)
- Sift in the flour/baking powder and mix carefully with a spoon/spatula
- Spread batter evenly and as smooth as you can on baking sheet and cook for 6-8 minutes. Keep an eye on the oven to make sure it wont burn.
- Put a new sheet of baking paper on the counter and sprinkle it with sugar.

When the cake is cooked you have to work quickly, and an assistant is really helpful
- Flip the cake onto the sugar coated paper and pull of the top paper
- Spread the filling/jam on the cake
- Start rolling, leave it resting for a few minutes, still wrapped in paper, till it has cooled down.

Eat and enjoy!

On another note:
I have been thinking of starting a new weekly feature. Last year I had the restyle project, and for a few months I also cooked/baked/tried a new ingredient every week. It is nice to have a goal to stretch towards, I am just not sure what I want to do now. Any suggestions??

Thursday, November 3, 2011

Only in Paris?

Fresh pastries for breakfast, from my own kitchen!


How - the backward way

4. Cook for about 20 minutes at 200 C
3. Fold and pinch with a fork
2. Place a spoon of apple jam and a pinch of cinnamon in the middle of a square
1. Thaw pastry

So easy!
They might look a little funny, but that doesnt matter when the taste is superb.
I will certainly get that (so easy to use it feels like Im cheating) frozen pastry again.


Monday, October 24, 2011

Produce: before the party

I told you about my birthday some days ago, 
and this is what cooking for a dinner party looks like: 


Bread in an early stage.


I love cutting, cooking and eating vegetables.
Here with carrots, turnips, beet, garlic and thyme.


"See, THIS is a rosemary twig. Now what about that twine..."


 Tie a pretty bow and repeat.


(I actually really like the colors going on in the picture above.)


Sadly, I have no pictures of the finished result, and we ate it all. 


What I wore:
Vintage dress, some store in Oslo
Apron, vintage fabric, made by me
Bracelet, from my grandma
Matching orange knife, a gift


More updates on my life over at Kristins blog. 
(I guess thats what happens when you live together)


LinkWithin

Related Posts Plugin for WordPress, Blogger...