Showing posts with label budget wedding. Show all posts

Monday, November 3, 2014

Wedding dresses under 2000 kr

A few people have asked me where I got my wedding dress, and I have to disappoint future brides when I tell them the dress is not from a known bridal designer, and actually a fake Dolce and Gabbana gown found in a small shop in Tallinn. However, if you are interested in the style I wore, or have a small dress budget, I have a few tips for you.

1. Skip the bridal salons and go to every other store that sells dresses. You will not get the same kind of service, but that is part of what you pay for with a wedding gown. The downside: This might be easier in the spring/summer when white dresses are more weather appropriate than the rest of the year. 
2. Go to the bridal salons (yes...) to try on dresses and get an idea of what you like and what you don't like. While trying on many gorgeous dresses I realized I felt very uncomfortable in the heavy and structured gowns, and the ones I liked were way way out of my budget.
3. Try vintage for a unique dress at a good price. But beware of alteration costs, unless you or your mom likes to sew. Try finding a seller that will let you try it on and return it if it doesn't fit. 
4. Bridesmaid dresses can often be found in white/cream for the fraction of the cost of a wedding gown. They will probably be less elaborate than wedding gowns, but that might be what you are after!
5. Consider a non-white dress! Gold sequins anyone? 

Here are a few picks from around the web that I would have considered for myself a year ago. All under 2000 kr, with just one exception...


1. ModCloth Wed and Where, 758 kr
No lace, but with the same silhouette as my own wedding dress.

2. ASOS Floral Embellished Maxi Dress, 875 kr
A smilar, flowy dress. 


Thursday, October 2, 2014

A real wedding budget


I have read a LOT of wedding blogs the past year, and one of the things I find really interesting to read about is the facts of wedding planning, including budgeting. So today I am writing about our budget, and maybe there are a few future brides/grooms that can benefit from it.

Planned budget: 50 000 kr
This number was very random, basically the highest amount I thought we could spend... I quickly realized it would be very difficult to keep to it. Earlier, I wrote about how to make a wedding budget, which might be helpful early in the process.

Actual budget: 77 500 kr
Was it really the "budget wedding" I wanted it to be? Comparatively, the average for weddings in Norway is around 100 000 kr, so maybe not. Being a part of a non-profit organization for 8 years has had a big impact on my view of finances, and it turns out that paying a professional for their service cost a lot more than I thought. PS. Our honeymoon and rings are excluded from the budget.

Wednesday, September 17, 2014

What I Wore: Wedding Edition


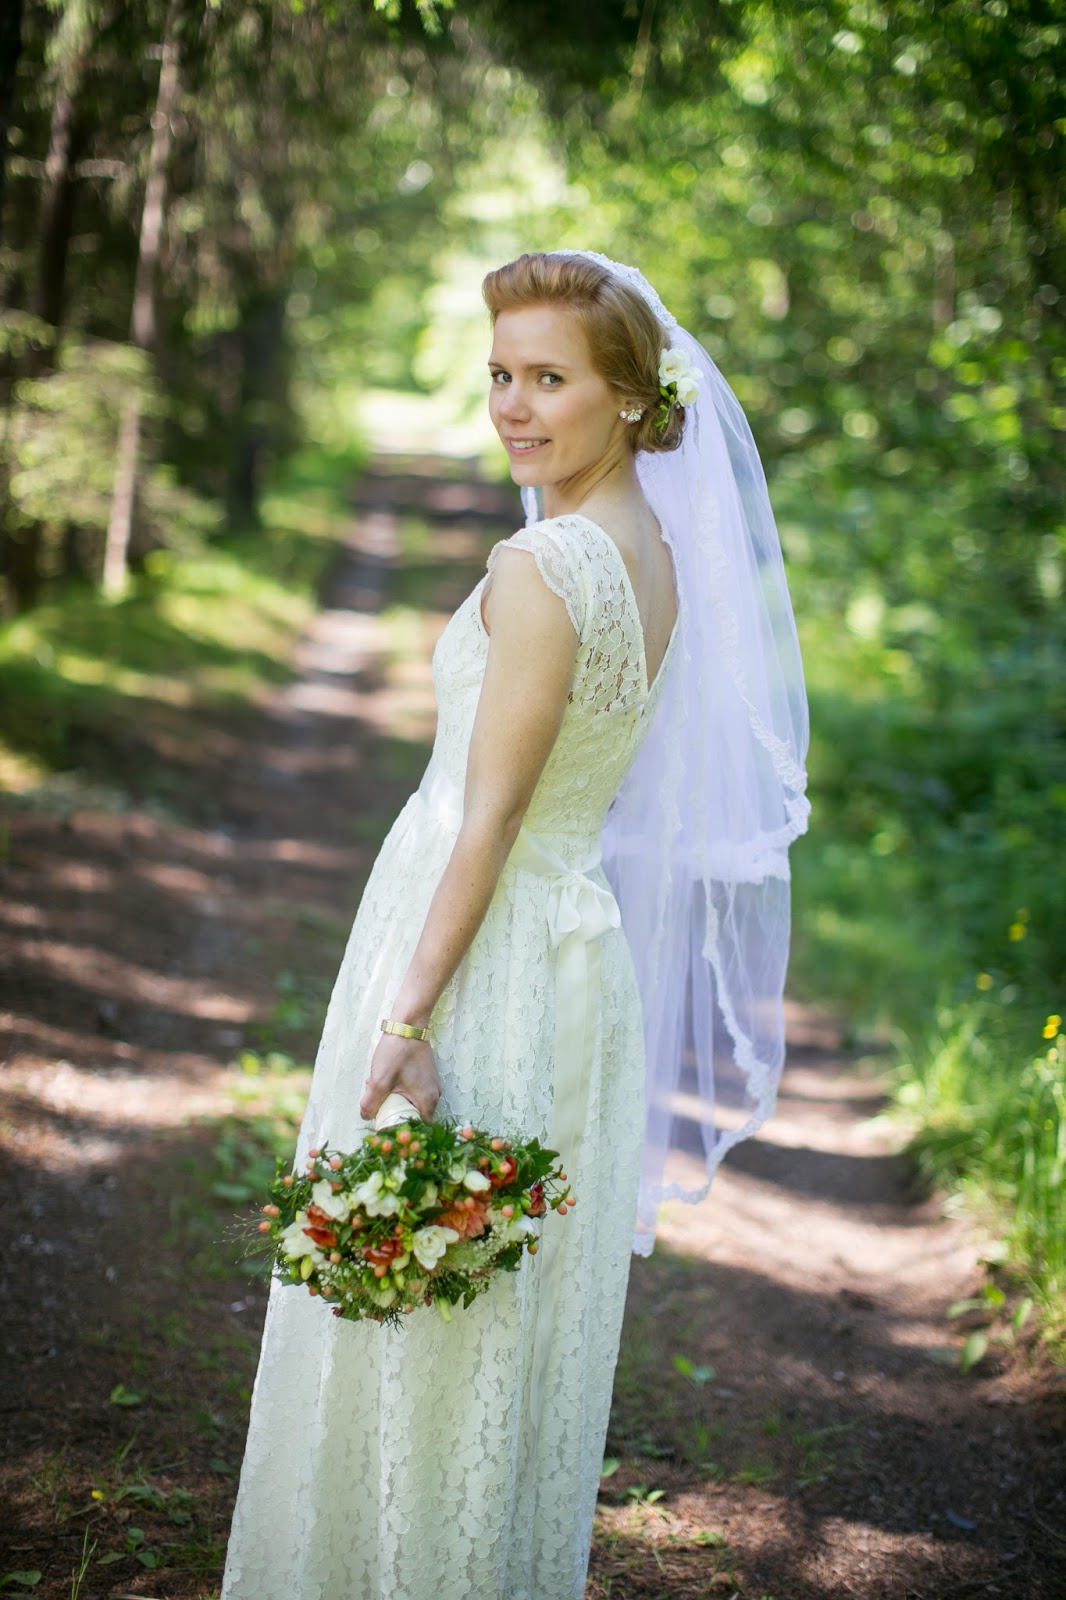
Finally I can share details of the dress that I worked on for so long! My wedding dress was a cap sleeve, ivory lace, round neck, sheath gown with a sash - to use all the wedding terminology... The store didn´t have my size, so it had to be taken in a little, which I decided to do myself. This was a lot harder than I had thought, mainly because I wanted it to be impeccable. In the end I settled for about 99% satisfaction, and with only a week left before the wedding there wasn´t really anything else to do about it. I loved wearing the dress, it was light and airy and comfortable, not heavy and itchy like many of the other wedding gowns I tried on.


Another challenge was that the fabric was very thin, so I had to add extra lining. I found the perfect silk slip to go underneath, and when everything else was done, I basted it to the dress and plan to remove it so I can reuse it for something else later. I also changed the back of the dress to make a V-neck instead of a round collar, added lace to make tiny cap sleeves, and a ribbon sash around the waist. More on the dress process here. 


I loved my vintage accessories. Early on I knew I wanted to wear the bracelet my grandma gave me. I also wanted to have something borrowed, and was lucky I got to choose between several vintage pairs of earrings from Mike's family. I settled for a pair of white rhinestone clip-ons from the 1950s, but there were some other really pretty ones too.


I was very happy I had a cardigan. Despite the sunny weather, Ålesund was quite windy on June 28th, and because of the sun we had to resort to pictures in the shade. I had first scoured Etsy for hours to find the perfect, fun and vintage cardigan. I found it, ordered it... but it never arrived! So a week before the wedding I went to the closest mall, found a very plain peach cardigan and settled with that decision. In addition, for parts of the photo shoot I was actually wearing long-johns! You can't see it, but it's there.


Matching shoes and nail polish with my maid of honor was the closest I got to a cohesive bridal party look. (Though I did make sure the best man had a neutral colored tie.) But since we were all wearing flowers I think that settled the matter if anyone was in doubt. 


I wore the veil for the ceremony and some pictures, but decided to leave it off for the rest of the day. To be honest, a veil is kind of in the way, especially if there is any wind or lots of hugging involved. The cap and lace matched my ivory gown, but the tulle itself was a very different shade of white. It is more noticeable in the pictures than I thought it would be, but that´s not a big deal.

My wedding garb was really a DIY and budget effort. In total, the outfit cost me around 4000 kr, and a little more than half of that was for the dress and everything I needed for alterations. An added bonus is that with some minor updates, everything but the veil can be used again. Or is there any other occasion than your own wedding that calls for a juliet cap veil?? It would be sweet to use it again.

Dress: A Dolce & Gabbana knock-off from a small dress shop in Tallinn, Estonia
Slip: Else Maries Undertøyssalong, Skien
Veil: Vintage, via Adorned in Grace
Cardigan: Cubus
Red sandals: Esprit
White pumps: Vintage (already owned)
Bracelet: Inherited from my grandma
Earrings: Something borrowed - they were Mike's great-grandmothers
Handkerchief: Inherited. Also Mike's great-grandmothers
Hair and makeup: Anniken at Fri Frisør
Flowers: Blomsterstua Ålesund

Photos: Irene Lovund

Sunday, September 7, 2014

Kraft wedding programs

Yesterday I somehow ended up on Google+, and while I was there, I changed some picture settings. Today I had a comment on an old blog post saying the pictures were missing. At first I thought I might have reached my storage limit (is there such a thing on blogger?), but quickly realized what had happened. Reversing that was harder than I would have thought, but about an hour of googling and trial and error, all my pictures are back where they were. Lesson of the day: Keep your Google+/Blogger photo albums public, and DO NOT delete any of the pictures. 

After this warning, back to some wedding chatter. There really isn't any plan of order for the wedding posts, they just happen, in case you were a little confused by my blogging lately.

Making the wedding programs myself was a given: I have experience with layout and design from work, and it was a great way to save money. Since we and our guests speak two different languages, I thought it would be helpful with pretty detailed programs, which is actually very common in Norway anyways.


First: Ceremony programs

These were pretty straightforward once we had decided on what to include in the ceremony. The order of the service and text for the hymns were all on the inside. On the front we used the illustration from our invitation, and the names of the all people involved in the ceremony were on the back. This was printed on medium heavy kraft paper in black and white. I made separate English and Norwegian copies, and since it was a small wedding, our lovely greeters knew who needed which one.


Secondly: Programs for the party

This project was a little more complicated. The contents of this booklet included the program and menu for the evening, some local barn history (!), a short presentation of each guest, fun facts about American and Norwegian wedding traditions, and our guest book. Writing these pages took a while, but I enjoyed it! I didn't get to ask our guests if they liked it/found it helpful/entertaining, but I know my dad couldn't stop reading it the day we were setting tables...


The cover is printed on heavy kraft paper and the contents is normal white printer paper, to save some money and increase readability. Everything was stapled together, and each folder got a piece of washi tape on the front where the guest name was written. Which meant no need for place cards! One of the deciding factors for assigned seating was in fact these programs, as I couldn't figure out another way to get each guest a program in their own language.


I just love mail, and even before we were engaged I pinned a postcard guestbook. I started collecting vintage postcards, but for the longest time had no idea how to actually use them. The solution I ended up with was to tape a postcard in each wedding program, hoping guests would write a greeting during/after dinner. It was never explained except in written form in the program, which might be why only about a quarter of the guests used it. So now I have a stash of amazing postcards waiting to be used, and that is no bad thing either.

Did you/would you have programs for your wedding?

RESOURCES
Kraft paper: Green Earth Supplies
Tape: WeXStore
Vintage postcards: Memory Saver and Hens Feathers on Etsy, and second hand stores here in Norway and the States
Fonts: Animatic and Channel

Photography: The nice action shots are by Michaela Nichole Photography, the others are taken with my phone in my kitchen.

Friday, August 22, 2014

Table numbers for book lovers


Our wedding party pictures have arrived! We are still waiting for our official portraits and ceremony photos, but I am excited to share some moments from our wedding reception. First up is some of the decor.

With only six tables it might seem unnecessary to make table numbers, but I still wanted to. It wasn't until a few weeks before the wedding that I stumbled upon a great idea I wanted to incorporate. Instead of simple numbers, we used quotes from some of our favorite authors to name the tables. The quotes were either on love and relationship or books and reading. 

To make the table numbers I printed authors and quotes and kraft paper, as well as corresponding cards with all the guests names in place of escort cards. The name cards were hung by the entrance, and the quotes were simply propped up against other decor on the table.


One of the quotes by C.S. Lewis were a part of our reading in church. I don't think it is common to use anything but scripture for church ceremonies, but I had read the passage "Being in love is a good thing, but it is not the best thing", in Mere Christianity, and we thought it was so fitting for our relationship that we wanted to include it. 


The other authors we chose were Brandon Sanderson, A.C. Doyle, Emily Brontë, Oscar Wilde and Steven Erikson. Some of these are contemporary writers, others have published books considered classic. Coincidentally, this summer we have read books by two of the authors above.

We didn't plan on a theme for our wedding. However, with our invitations, these table numbers, and the books we used as centerpieces, a book theme slowly emerged, and we didn't mind at all. 

Photography: The amazing Michaela Nichole Photography

Wednesday, July 16, 2014

Wedding Garter DIY

For the wedding, I was not planning on wearing a garter, and certainly not do the garter toss - that would freak me out! It seemed like an annoying thing to wear and yet another thing to spend money on, but then one day I looked through my stash of ribbon and realized I had everything I needed to make my own.

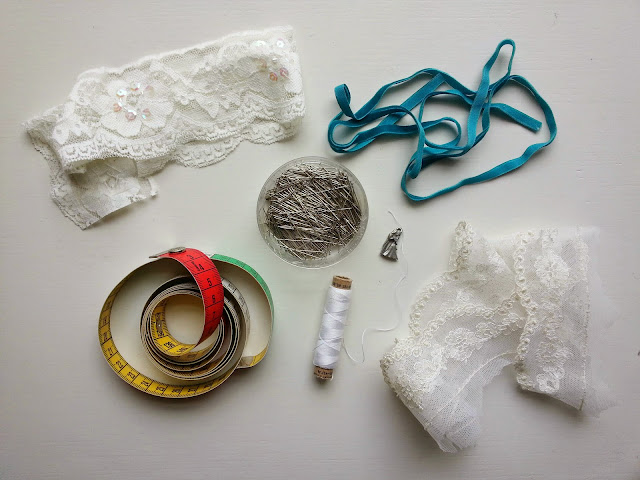
You need: 
- Elastic lace
- Needle and thread, or sewing machine
- Measuring tape
- Embellishments: Use whatever you fancy, like ribbon, rhinestones,
beads, flowers, charms etc

This is one of the easiest things you can make for your wedding (easier than a DIY veil for example). The project took me about 20 minutes, including taking the pictures!


First, measure your thigh where you want your garter. 
Use measuring tape, or wrap the lace around your leg.

Sew the ends together, with either sewing machine or needle and thread. 
Now try it on to make sure its tight enough! Adjust if needed.


Find your embellishment and decide where you want it to go.


You can sew a small bow like me, and add your something blue.


An easy and cute garter that you can make yourself.

Wednesday, June 11, 2014

Wedding dress alteration, continued


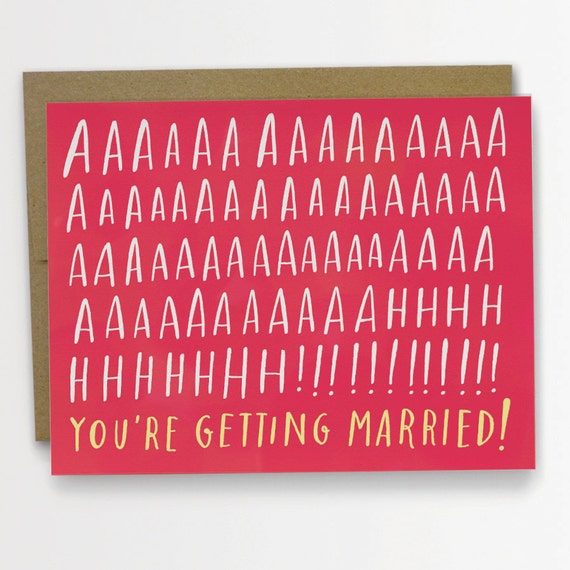
Yes,  lately my feelings resemble the expression on this card... Only 17 days to go!

After talking to my mom about shoes for the wedding I changed my mind and decided to wear white pumps for the ceremony. Considering the veil I have chosen, my fun sandals just wouldn´t work with the outfit. But the plan is to change shoes later, when I take the veil off. If I hadn´t already owned a pair of white pumps I am not sure I would settle for this solution though. And another happy result is that I don´t have to hem the dress! The ceremony is where I would be most worried about tripping, so I think I can live with a little long dress later, as long as it fits when we are in the church. I hope this logic works out practically as well.

In addition to taking the dress in, I also wanted to alter the back. This meant shortening a zipper from the top. Since I am not an expert on tutorials, I will link to a couple here and here.

But then I didn´t know what to do - should I add a sash or not? And what about the pretty lace trim. Ahhhh... Luckily, my maid of honor came over to help me make that decision. I am so close to being done now, which is about time. Pictures of the finished product will have to wait a few more weeks.

PS. For amazing cards for a wedding/any other occasion, check out Emily McDowells shop on etsy.

Wednesday, April 23, 2014

Envelope liner DIY

I got the question of how I made the envelope liners for our wedding invitations, and thought maybe some others would be interested as well. It is a very simple way of making your mail fancy and extra special.


What you need:

- The envelope you want to line
- Paper for lining
- Paper or cardboard for template
- Ruler
- Pencil
- Scissors
- Glue


STEP 1: Measure your envelope. Subtract a few millimeters from each side, and keep in mind angles like the one above. You can let the liner stick half way down the envelope like I did, or line the whole thing. This isnt really necessary, and if your liner is expensive, this will cut the costs.


STEP 2: Make a template on sturdy paper or cardboard. Be more accurate than the drawing above suggests. (It´s not my actual template - I cheated a little bit)


STEP 3: Make sure your template fits the way you want inside your envelope. Here the sides are slightly more angled than the envelope, which you may or may not believe was done on purpose.


STEP 4: Cut as many liners as you need, with the help of your template and a good pair of scissors. You can also use a paper cutter if you have one. 


STEP 5: Glue your liner to your envelope. To avoid wobbly paper, let it dry under a stack of books or something, to keep it nice and good looking.

Voilá! You have a pretty lined envelope! 

Wednesday, April 2, 2014

Wedding invitations DIY


I love paper. And envelopes. I have a whole suitcase full of decorative paper, cutouts from magazines, scrapbook paper bought on travels and much more. Naturally, when it came to our wedding invitations, I was quite excited to send out pretty mail.

After reading a few wedding/illustrator blogs I had a good idea of what I wanted, and kraft paper was a non-negotiable. It doesn´t hurt that it is recycled, which makes it almost second hand, or what?


I have surprised myself a little with this project. Originally I planned to go to Oslo to score the PERFECT paper for envelope liners, but ended up using something I have had for many years, but found too pretty to use. I calculated and thought I would have enough, but my math didn´t add up right, and I ran out. Luckily the store still had the same paper, probably 9 years later!


Kraft paper, illustration, typography, pretty patterns and vintage stamps. Could my heart be happier?

For the layout I used Indesign, as it is the program I know best. You can recreate something similar in Word, as I did for the sketch, or use Photoshop or whatever you prefer. The fonts are free and found online.

In total, the only really new thing I bought was three sheets of light A4 cardstock and some washi tape. The rest was new/recycled, vintage, or stuff I had at home!

My total spent for around 60 invitations: 650 kr, plus 500 kr for postage.


Sources: 
- Kraft paper and envelopes: Green Earth Supplies
- Envelope liners: Norway Designs in Oslo. You can find the same styles online by searching for florentine paper
- Illustration: Angie Thompson
- Vintage stamps: Auctions at QXL
- Embroidery thread: From my grandma´s sewing kit
- Monogram paper: Norli at Arkaden in Skien
- Washi tape: WeXStore


Sunday, March 9, 2014

How to make a wedding budget

Heels or flats? Professional or DIY pedicure? Maybe a spray tan? All the decision...

Recently, a newly engaged girl asked me for tips for their wedding. I had no idea what to say to that, and in my mind I was thinking: Tips for what? Dresses? Flowers? Style? Colors?

There are a thousand tips to give and take, but after a few days it came to me that setting a budget might be my best tip so far. I love lists and budgets and saving, so luckily this comes quite easy to me. I can get quite excited for every time I am under budget,

Wedding budgeting in 5 steps

1. Figure out how much you can and want to spend. 
A wedding might be one of the costliest things you do, so be wise! Discuss who will pay (the couple, parents, others) and how much you can save before the big day. Even if you have a lot of money, you might not want to spend it all on a party. Are you saving for a house for example? Or perhaps you want a dream honeymoon?

2. Do some research
What are the prices for things like flowers and catering?? There is a lot of research to be done to be able to make a realistic budget, and it depends a lot on the style of celebration you want and where you live. This step will require research, take a long time and can be very frustrating, but also fun. I was surprised at how much things cost, and have revised our budget more than once.

Also, decide on the size of your guest list. Your budget can really depend on this factor, but a small wedding can still be an expensive affair.

3. Think of all the costs, down to the details.
Here are the most common categories for a Norwegian wedding, with an American twist. I don´t have all of these things, and you probably won´t either. It might not be natural to include the expenses of f.ex rings and honeymoon in your wedding budget, but it can help you get an idea of the total costs.

Saturday, February 8, 2014

Our wedding website

We have a wedding website! Visit it here: mikeandragnhild.blogspot.com The page has a simple layout, and will have information about culture, the party and more. The page will be updated, but is more like a website than a blog. I will continue writing about the wedding here.

There are a ton of options for wedding websites, many through wedding pages, with features like RSVP, direct connections to registries etc. We chose blogger to keep costs down, and managed to not go over the budget of 0 kr for this post! Since I have had blogger for several years, I knew how to manage it well, and it helps to not have yet another account to manage. You can chose to pay a fee to get your very own domain, but we decided to spend that money on something else.

PS. I used this blog post with tips on how to make it look less like a blog.

Wednesday, May 22, 2013

House tour: the floor plan

I have planned a house tour of my little home, and the first part is the floor plan!

In some areas, I am a nerd, and my boyfriend is kindly helping me to be more nerdy than ever. The last thing he introduced me too is floorplanner.com. It was so much fun to recreate my own home in 2D, cause who doesn´t love a good floorplan?

Here is my take on the apartment as it is right now:


PS. Tonight is your last chance to enter my giveaway. I will draw a winner tomorrow :)

LinkWithin

Related Posts Plugin for WordPress, Blogger...